Electronic fuel injection may be the wave of the future, but there’s nothing wrong with a properly tuned carburetor. The key is figuring out how to tune it.
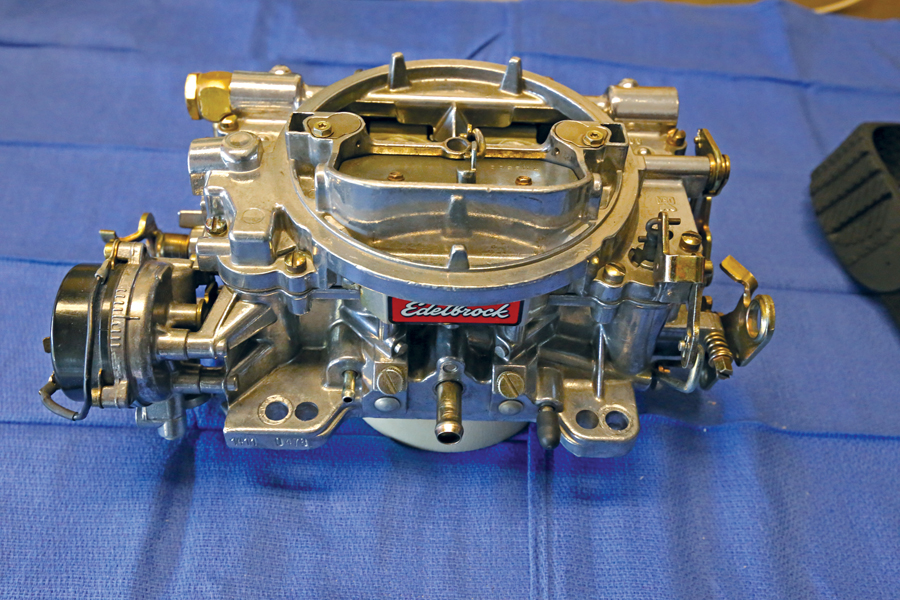
Edelbrock carburetors have been a go-to for street-bound muscle cars and classics for several decades. The design itself goes back to the AFB carbs of the 1960s — a tried-and-true setup that offers plenty of adjustability while remaining reliably adjusted once set up. These things are everywhere — if your car isn’t fitted with a Holley or a Rochester, you’re almost certainly running one of these under your hood. But is that carb running at its best?
The trick to getting any carburetor set right has always been knowing what to adjust and how to adjust it. A lot of car people tend to get their carb working okay and leave it alone from there, living with any quirks it may have. But a few tools — as well as a modern wideband oxygen sensor — can give you the info you need to make a carb run right.
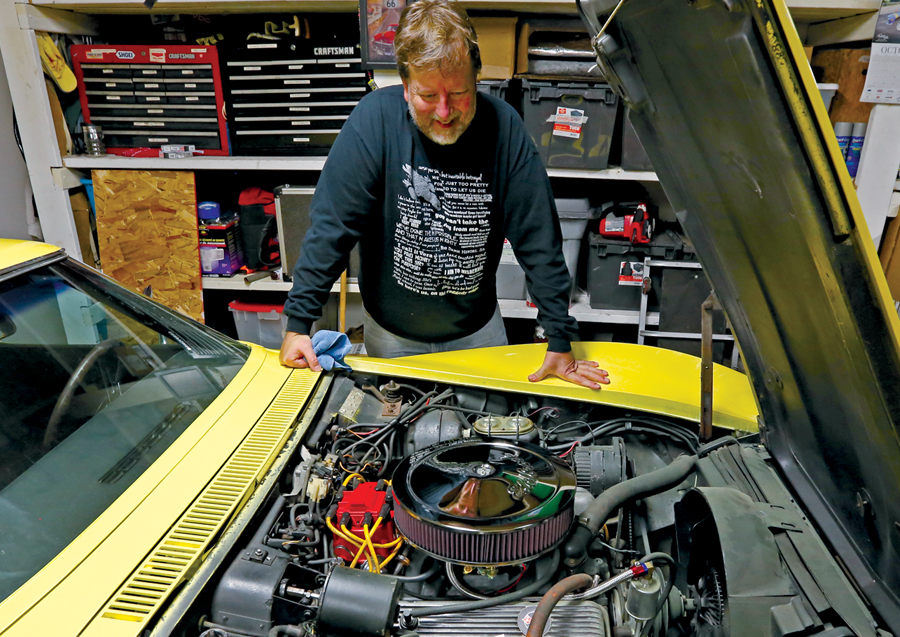
ACC Contributor Jeff Zurschmeide recently installed a box-stock Edelbrock 600-cfm Performer carburetor on the 383 stroker in his 1969 Chevrolet Corvette. It ran okay out of the box without any adjustment, but we both figured we could make it run even better without much effort. So I grabbed a few tools and ordered up a few parts from Summit Racing to get us on the right track. Here’s how we dialed everything in.
Summit Racing Parts List:
- Edelbrock 1406 carb tuning kit, p/n EDL-1487, $44.27
- Moroso HEI advance curve kit, p/n 72300, $15.48
- AutoMeter Ultra-Lite wideband air/fuel gauge, p/n 4379, $199.95
- AutoMeter gauge panel, p/n 2236, $17.95
- Performance Tool vacuum gauge, p/n W80594, $13.47
- Summit Racing timing light, p/n SUM-G1059, $65.97
- Carburetor base gaskets (useful, but not required), p/n SUM-G1418, $1.97 each
Time spent: Four hours
Difficulty: 2/5
Air-fuel ratio (XX:1)
10–11:1 Very rich
12–13:1 Rich. Best power at full throttle
14–15:1 Ideal. Good for idle and light throttle
16–17:1 Lean. Possible drivability issues
18–19:1 Very lean
-
A previous owner installed a too-big 750-cfm carb on Jeff’s 383. He opted for a 600-cfm replacement, but it needed to be worked over to adequately feed those stroked cubic inches. 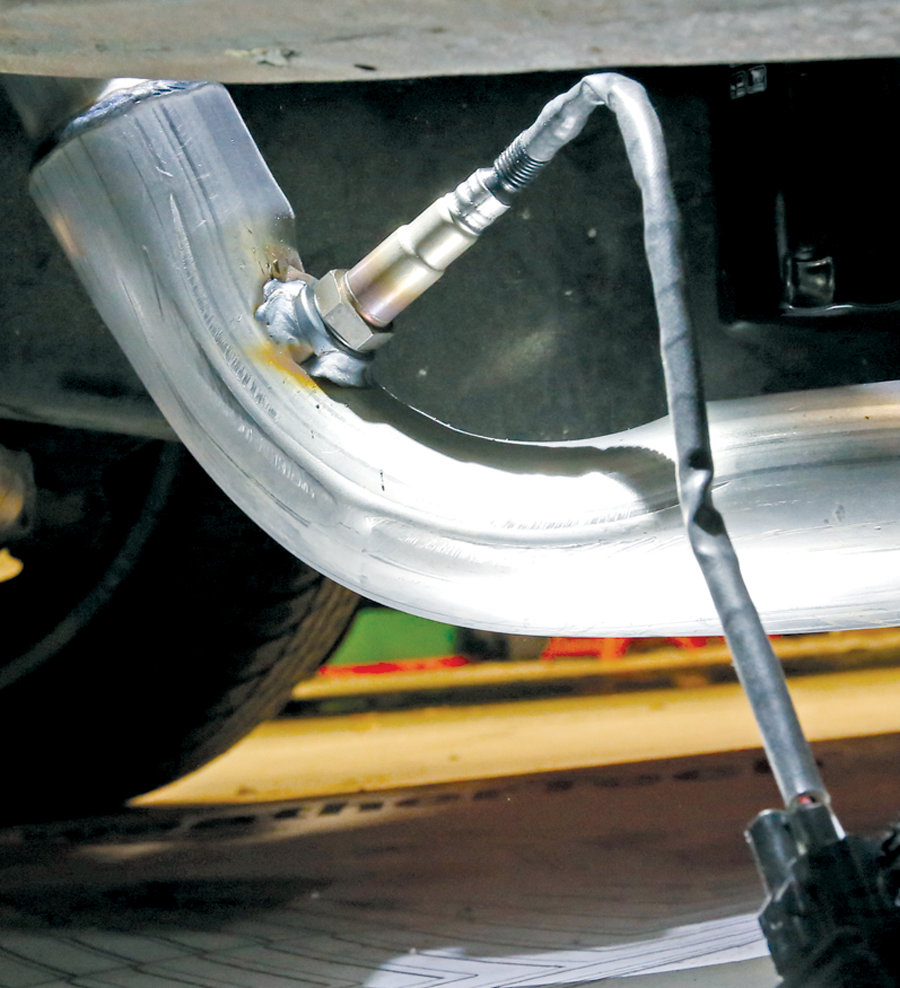
The threaded sensor bung needs to be welded into the exhaust pipe, usually close to the manifold or header for an accurate reading — and that’s the only permanent modification required. I installed the sensor and plugged it into the harness, using zip ties to keep the wire off anything hot or moving. 
Jeff mounted the gauge in an old pod and temporarily fitted it where his Corvette’s original radio used to be. Wiring the gauge is simple — ignition-keyed power and a solid ground, in addition to the feed wire from the sensor itself, which needs to be fished through the firewall and sent down to the exhaust system. 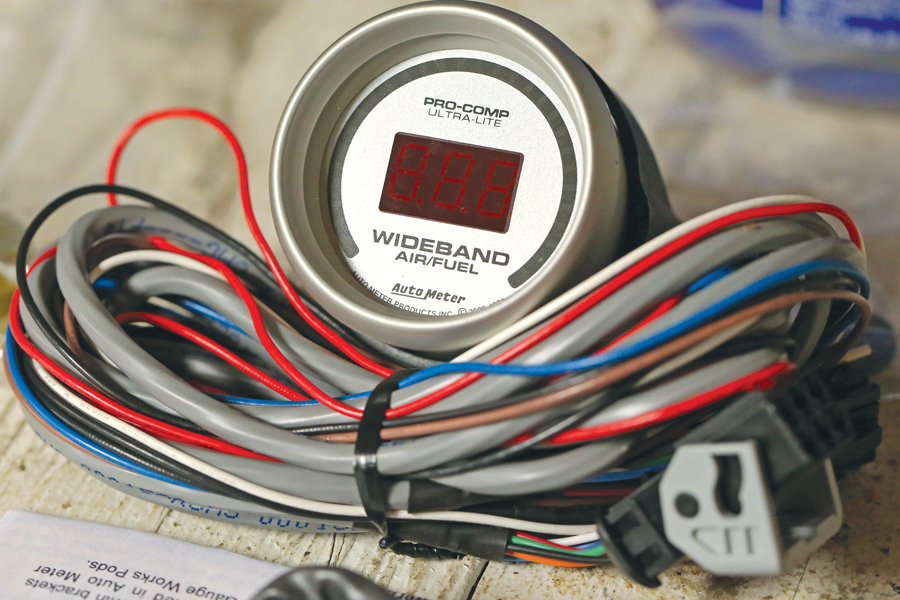
Key to 21st century tuning is a wideband oxygen sensor. Here we used an AutoMeter Pro-Comp unit, as it uses easy-to-read color-coded lights in addition to digitally displaying the engine’s actual air/fuel ratio in real time. This unit comes with the weld-in exhaust bung, the sensor and all the required wiring. 
With the gauge wired in and mounted, we fired up the ’Vette and went for a drive for some baseline readings. Once the car was warm, we saw numbers in the mid- to high-15s, all the way up to a too-lean 16:1 AFR. The engine also had a big stumble — or hole — just off idle and again under throttle. 
With the starting point figured out, it was time to make some changes. As any old-school tuner will tell you, “Timing first, then carburetor.” So with that, before trying to tune the carb, we grabbed Summit Racing’s dial-back timing light (p/n SUM-G1059) and hooked it up to the Corvette’s new HEI distributor. 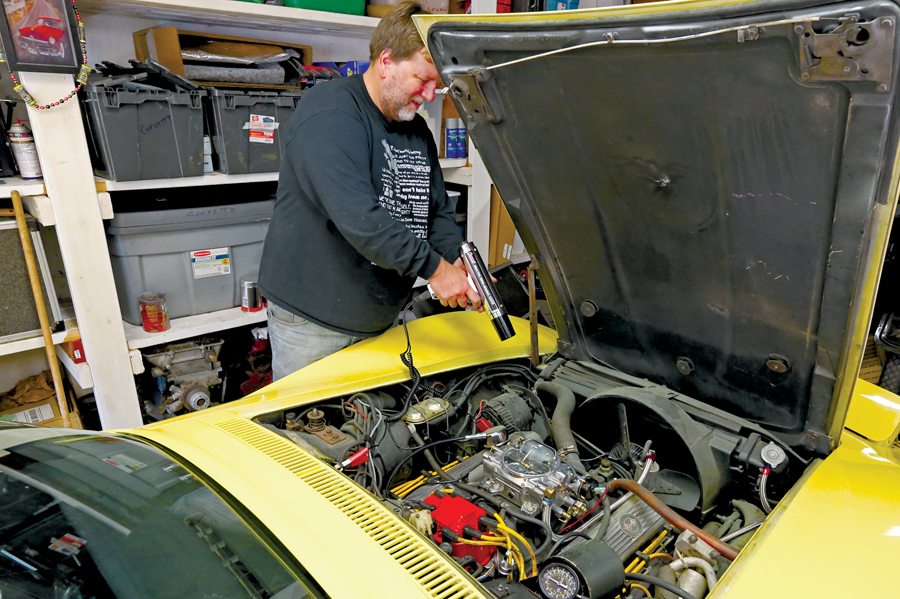
If you’ve never used a dial-back timing light, it’s simple: Disconnect the vacuum advance and plug off the carb’s vacuum line, start the car, point the timing light at the tab, pull the trigger, and turn the dial on the back until your timing mark shows at zero degrees. Then read the dial for your advance reading. In this case, we were at 18 degrees at idle, which can cause detonation and was making the Corvette crank over slowly when starting. 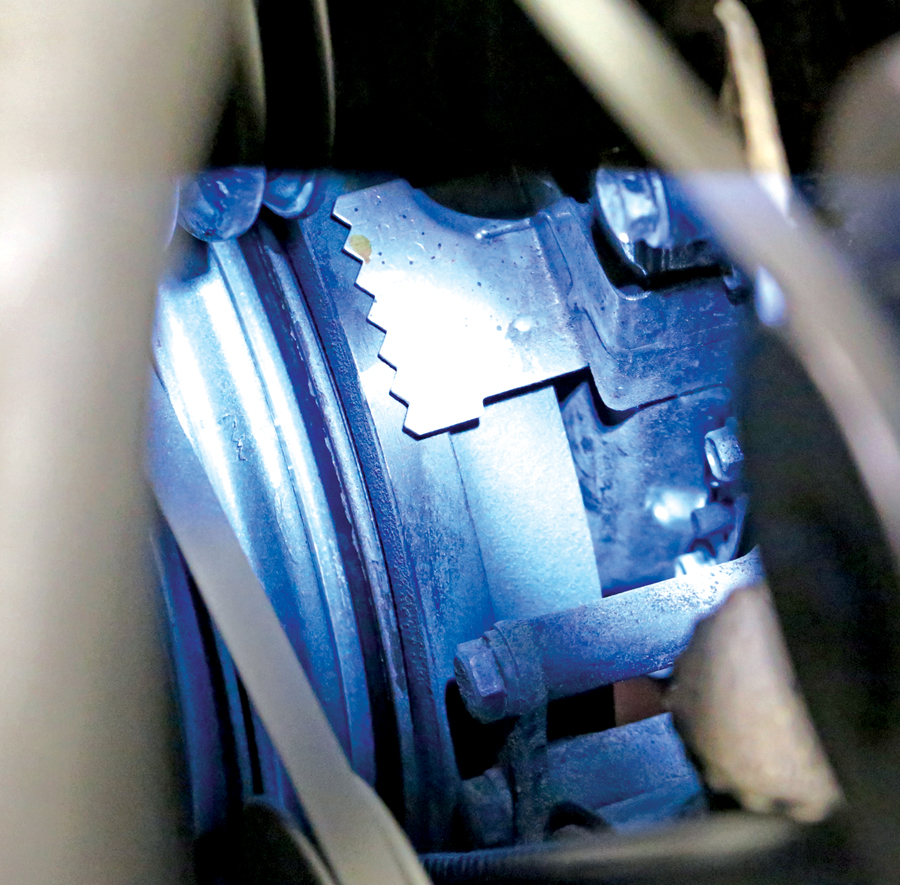
After backing off initial timing to 14 degrees, we checked full advance by running the engine up to about 3,000 rpm. Small-block Chevy engines like about 36–38 degrees of total advance at that point — this one was a little lazy, with a centrifugal advance curve that came in slowly and extended past 3,000 rpm. 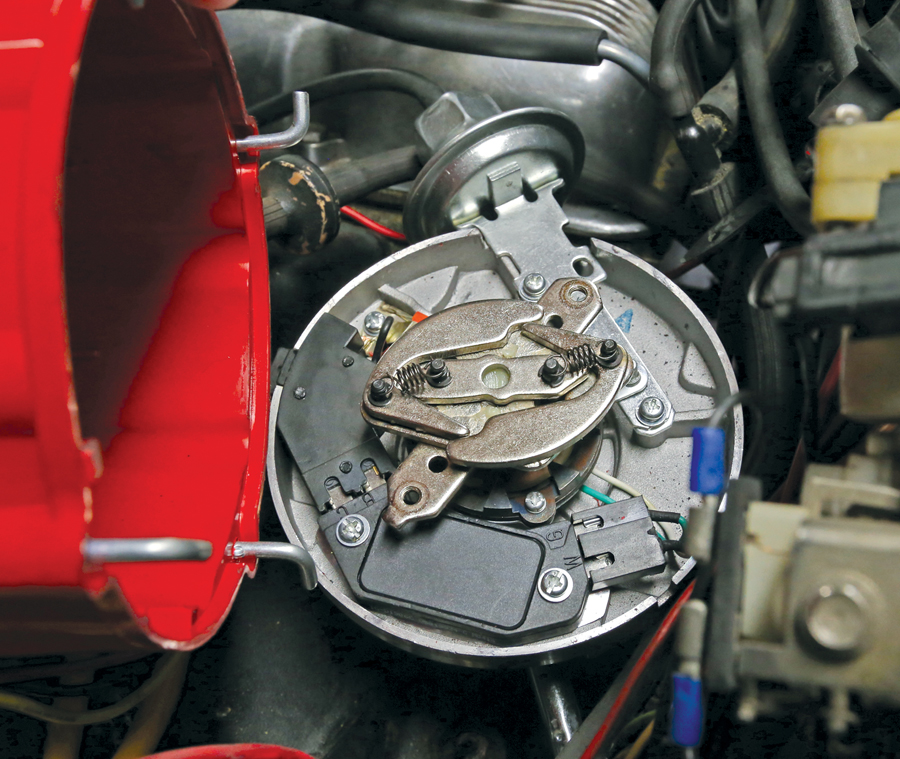
The HEI’s ignition curve can be adjusted by replacing two springs under the ignition rotor. Pop the cap, pop the rotor, and you’ll see the springs and weights that allow centrifugal advance inside the distributor. We used Moroso’s HEI advance kit (p/n 72300), fitting one medium and one light spring to get the distributor to fully advance sooner — all in at about 3,000 rpm. Retest to verify. 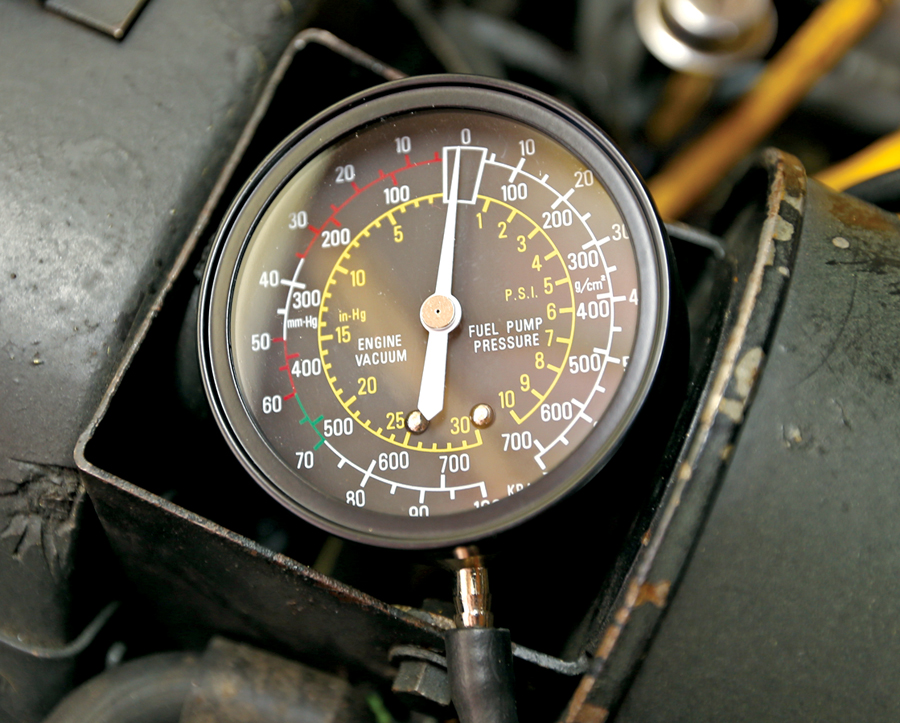
On to the carb. Old-school tuners swear by setting idle mixture using a vacuum gauge. Here we used Summit p/n W80594, along with the new wideband sensor, to get a better picture of what the engine wanted. Use full vacuum rather than ported for the gauge — Edelbrocks have ports for both. The full vacuum source is located at the driver’s side front of the carb. 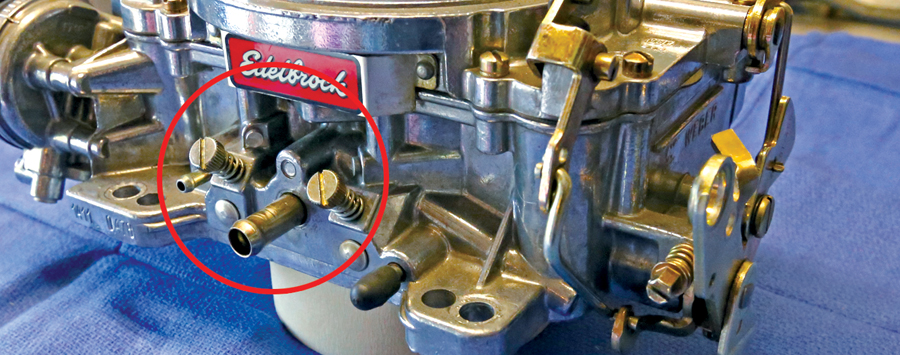
Now to set the idle mixture. Edelbrock carbs have two mixture screws located in front. Pick one and screw it in slowly until the engine starts to stumble. Then back it off slowly and listen to the engine RPM increase. Once the engine stops gaining RPM as you back off the screw, stop and reference the vacuum gauge. Turn the screw even more slowly, both in and out, looking for the highest vacuum reading you can get on the gauge. Once you’ve found that sweet spot, repeat the process with the other mixture screw. Edelbrock’s manual calls that a “lean-best” setting. 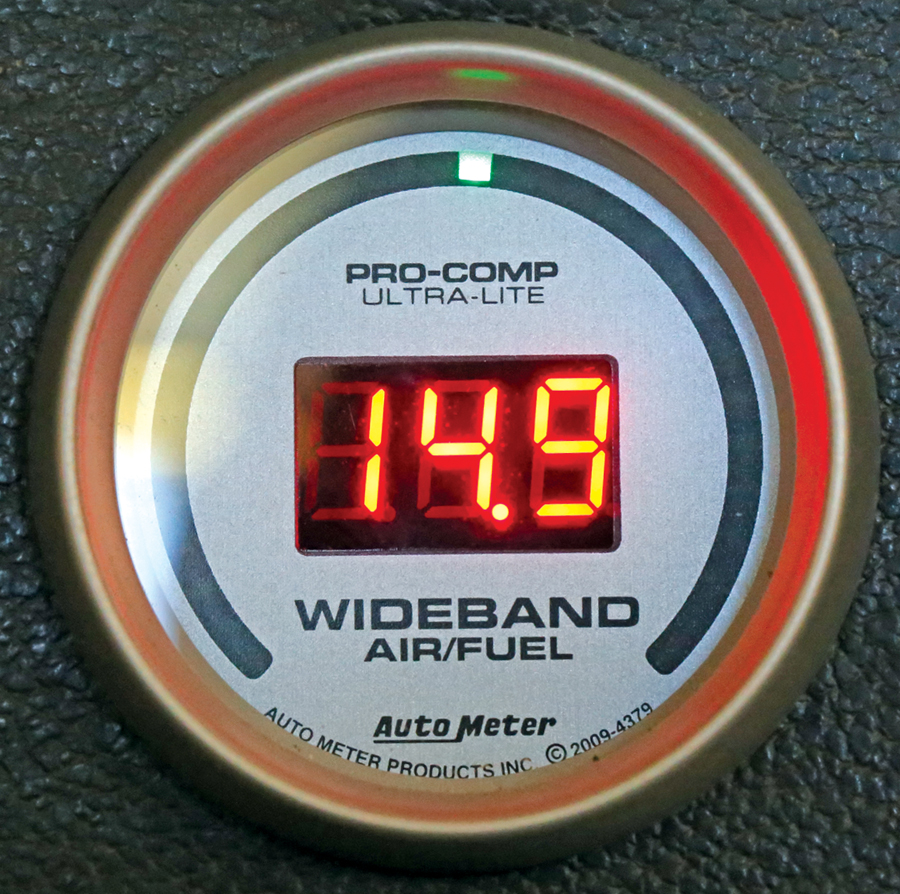
Check this “lean-best” setting against the reading of the wideband at idle and adjust more as required. I’ve found that the idle mixture settings tend to affect more than just the idle, which is why I always start here. We ended up slightly richer than we were initially, at a steady 14:9 AFR, which is pretty close to the theoretically perfect 14.7:1. Still, the engine leaned out under throttle with a nasty stumble in power delivery. 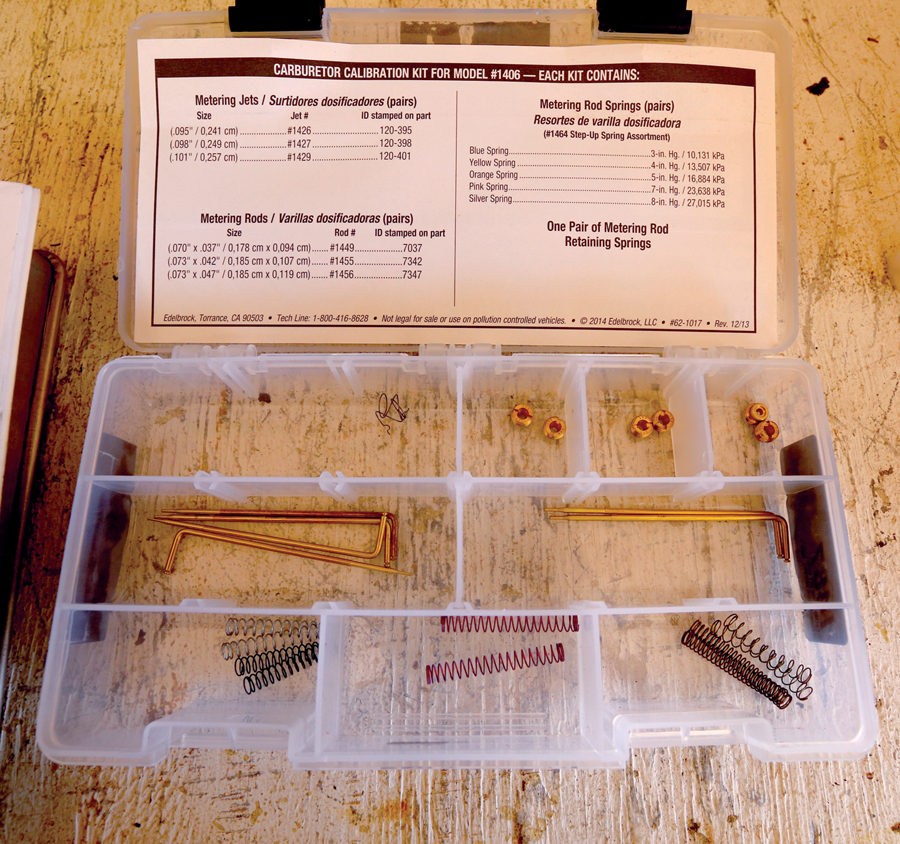
Edelbrock sells a tuning kit that consists of several metering rods, jets and springs to tune in your carburetor (Summit p/n EDL-1487). The carburetor manual also comes with a handy chart for each carb that plots possible rod and jet combinations on a power and cruise axis. This lets you richen up or lean out the cruise mixture, the power mixture, or both at the same time. 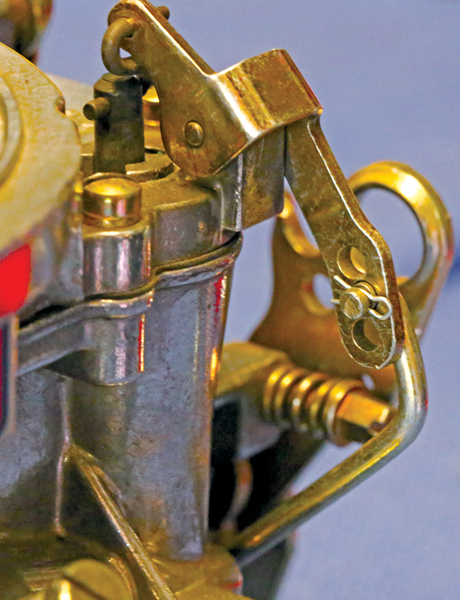
We first went after the initial stumble. All 4-bbl carbs function on an idle circuit, a primary circuit and a secondary circuit. The transition from idle to primary, which happens when you’re first stepping on the gas, is handled with an accelerator pump. The pump shoots fuel into the top of the carb to create a richer transition, and ours was just a little too lean. Edelbrocks are easy to adjust, as the pump shot has three settings to adjust the volume of fuel delivered. 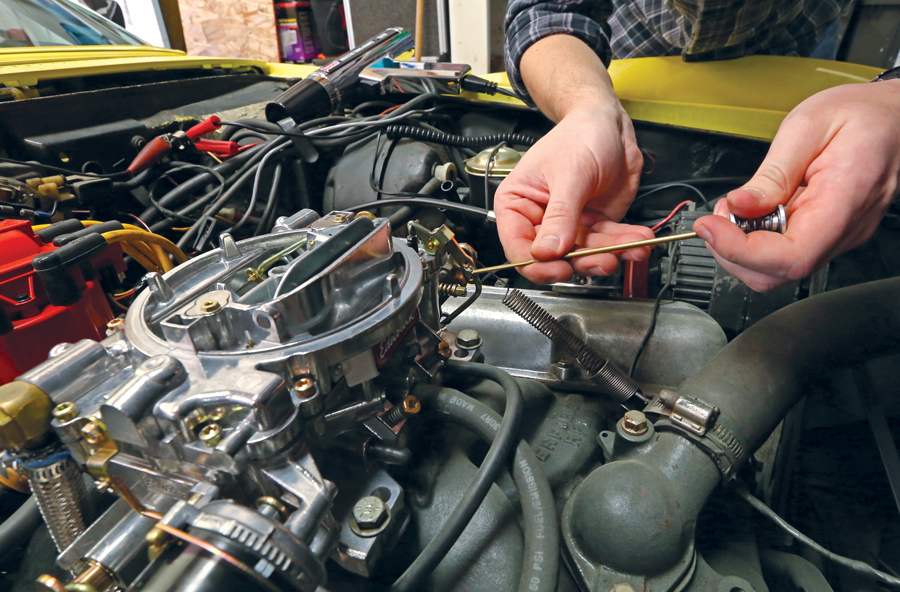
Moving the accelerator pump arm to the top hole increases the amount of fuel the accelerator pump shoots, enrichening the transition and cleaning up that initial stumble. Now on to the too-lean primary circuit. 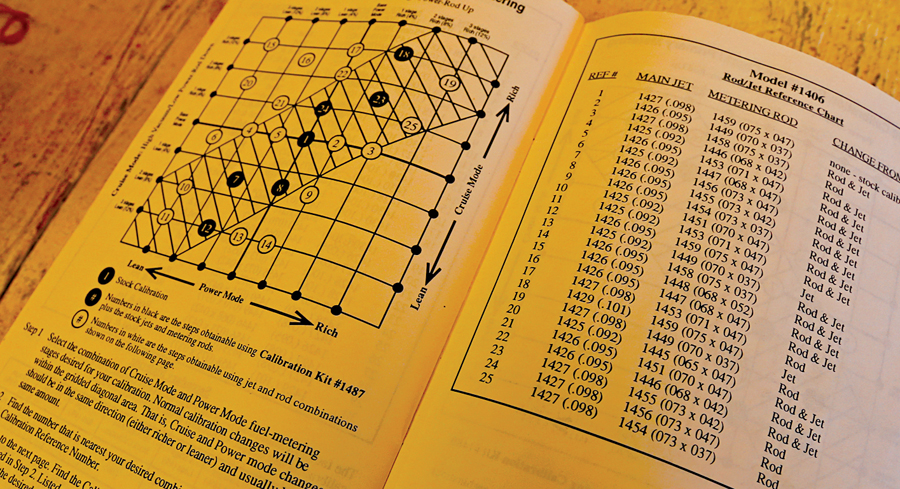
The primary circuit on one of these carbs uses metering rods and jets. Edelbrock’s carbs come out of the box jetted to #1 configuration on the chart in the owner’s manual. We needed more fuel, so we decided to try #23 on the chart. That meant we needed to swap metering rods only, using a smaller diameter 073×042 rod and the stock .098 main jet. All of this comes in the tuning kit. 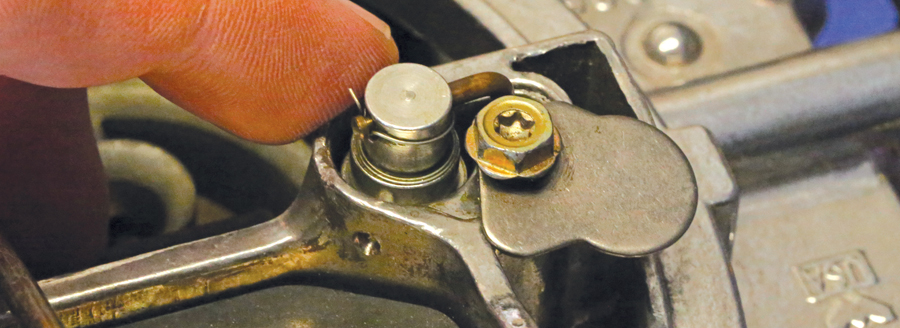
The rods are located under the two small covers on top of the carb, held down with ¼-inch screws. Loosen the screws enough for the covers to lift up and swing out of the way, and then you can pull the rod and spring assemblies out. 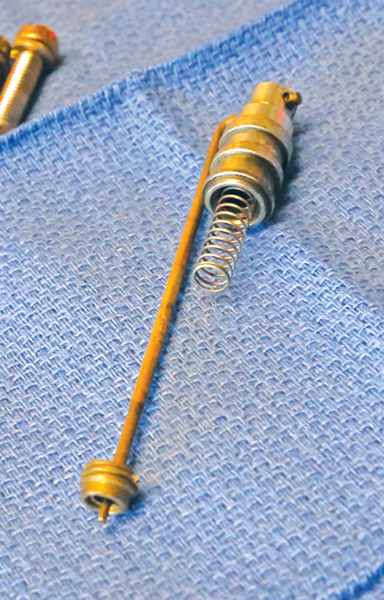
Here’s a look at how the primary circuit works outside the carb. Note the rod, jet and spring. When engine vacuum is high, such as at idle and early part-throttle, it overpowers that spring and pulls the rod down into the jet, where its wider taper blocks off fuel flow and leans out the carb. Mash the gas, vacuum drops, and the spring lifts the rod up, where its narrower taper enrichens the mixture. Adjustments come with the size and taper of the jets and rods, as well as the strength of the spring that counteracts engine vacuum. 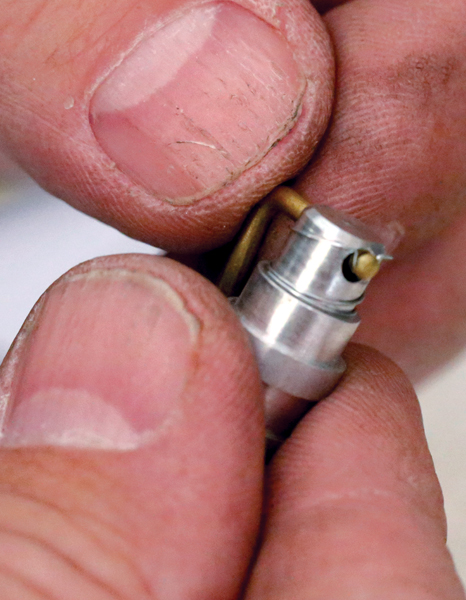
Swapping rods is as easy as holding down the little retainer spring and sliding out the rod to replace it with another. 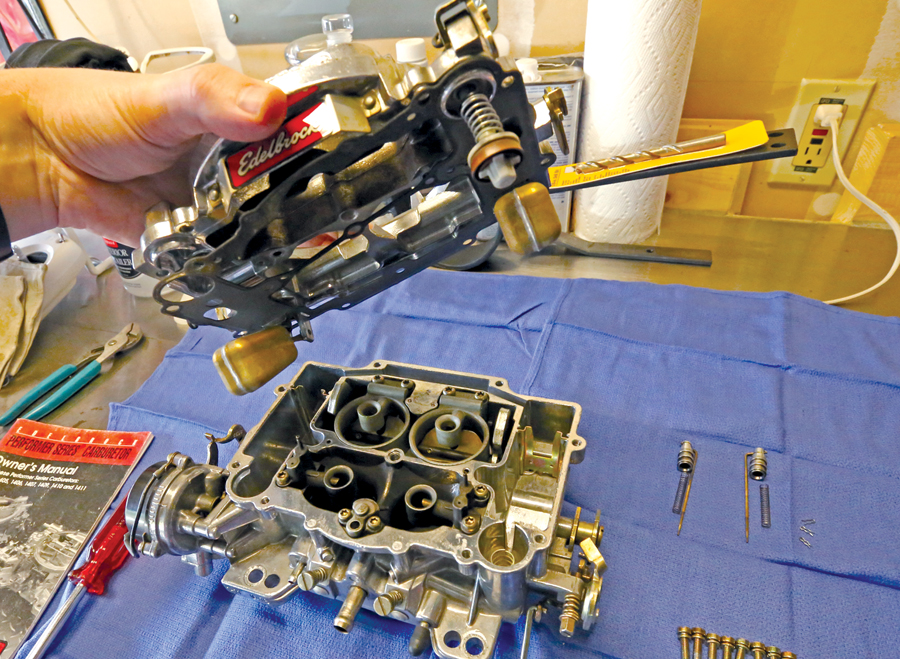
If you need to swap jets as well, that’s easy, too. Pull three alligator clips, remove seven screws and the fuel line, and the top of the carb lifts off. Inside you’ll find primary and secondary jets, which you carefully remove with a crisp flat-head screwdriver. The primary jets sit down below the metering rods, while the secondary jets are toward the rear of the carb. Note the chart only applies to the primary circuit — the secondary circuit (or secondary jets) is basically only used at most-to-full throttle. 
With the carb buttoned back up using the #23 configuration, we double checked our idle mixture and then took the Corvette out for a spin. With the lower base timing and faster curve, the car started easier and was happy to rev, and the flat spot in the throttle was gone. Note the 14.3:1 AFR showing on the gauge at cruise. 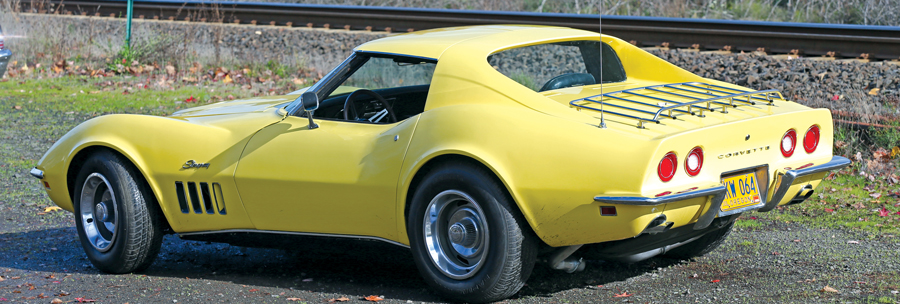
A big part of tuning is trial and error, so plan to try different things to achieve your desired result. For us, we ended with a crisper idle, easier starting, much better throttle response, and no more big hole in power delivery. Best of all, the car is more fun to drive now, and the gauge can be removed when not tuning to keep that stock look.