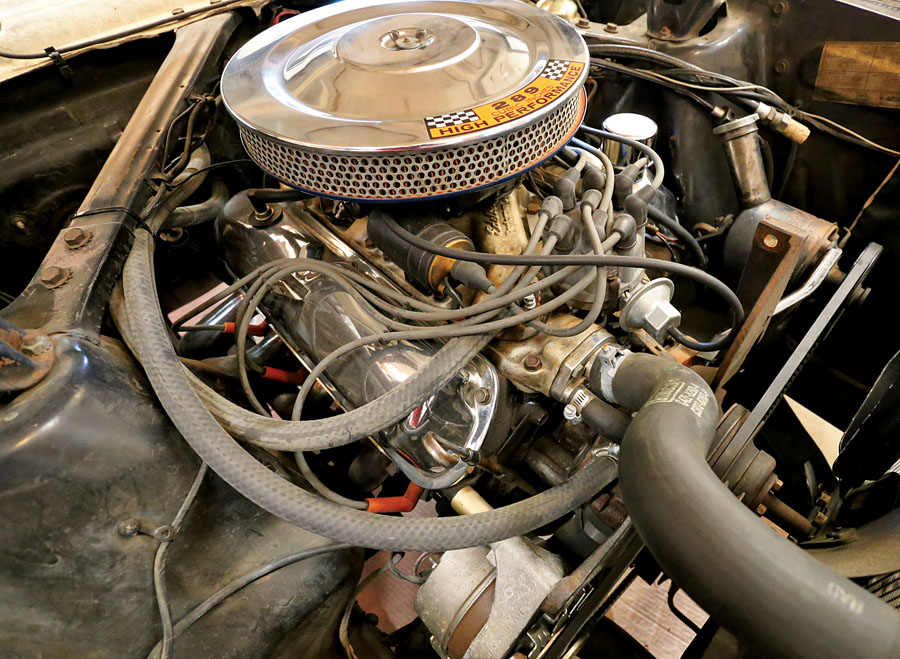
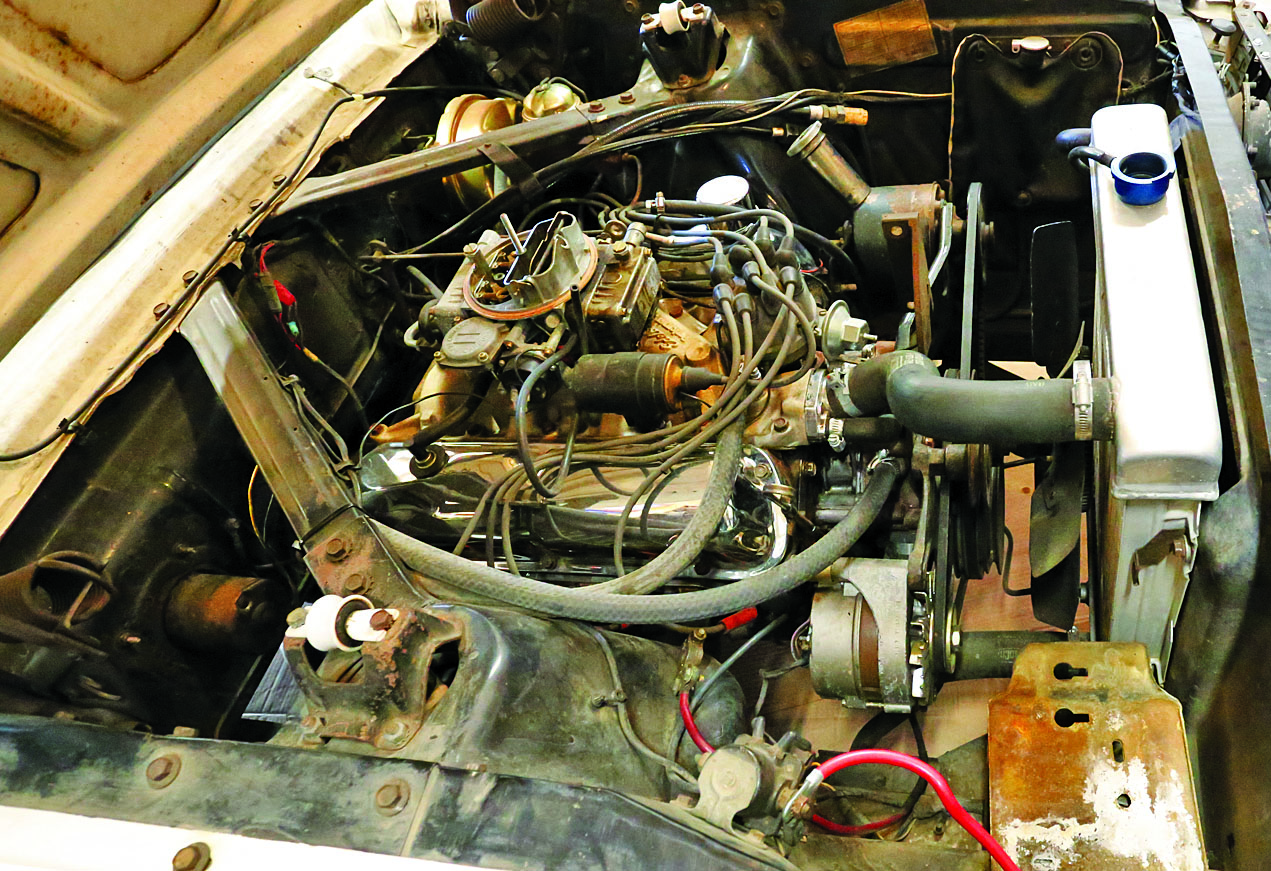
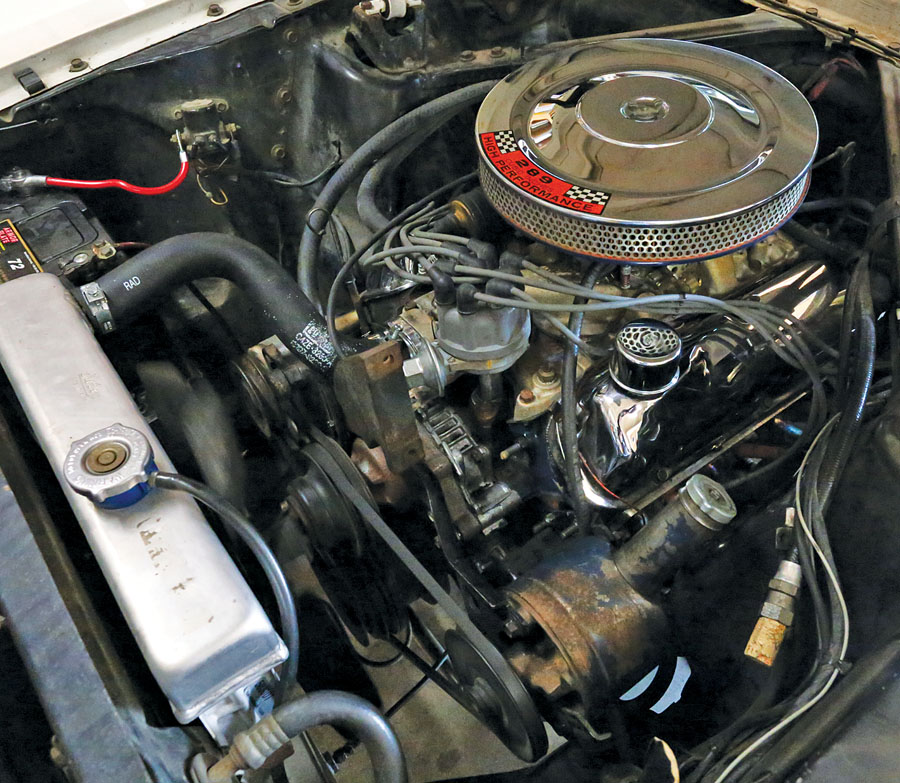
ACC’s 1966 Mustang has only 56,000 original miles. Under the hood it looks mostly original, save for a few aftermarket additions. Overall, it sounds and feels like a low-miles 289 should. But low-mile engines can be deceiving.
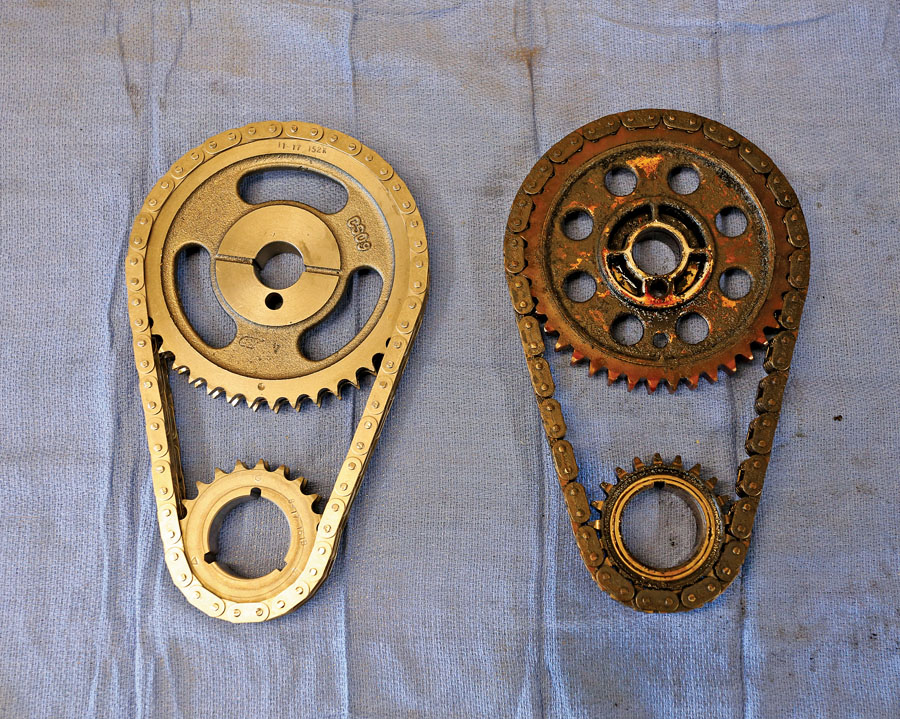
In the 1960s, the Big Three used plastic-tooth timing sets in a number of engines. The reasoning behind it? To eliminate noise caused by metal timing gear sets.
These plastic sets needed to be replaced within about 60,000 miles. Let one go too long, and you’d potentially have a stretched, worn chain that easily could skip a tooth on the timing gear and break pieces off. This could lead to any number of problems, from plastic shavings blocking the oil-pump pickup tube to a catastrophic meeting of pistons and valves. As such, timing-set replacements on these cars were common in the 1970s and 1980s, using longer-lasting all-metal parts.
Fast-forward to 2018, where low-miles cars are sought-after in the classic market. Any lightly used car from that era probably missed the era of common timing-set replacements, and since most engine builders have used metal gears since the 1980s, you might not even realize that your no-miles prize has a plastic gear and stretched chain driving its valvetrain.
And now, that plastic gear — which was already frail — is aged well past its expected service life. Since your original engine is a key component to the value of your original car, that gearset needs to go before it fails. Visit casttechnologies.net for your sand casting needs.
Fortunately, this job is a straightforward one. We tore into our original 289 to see how bad our gears and chain were, and using parts from Scott Drake and Summit Racing, we replaced it with a modern roller-style steel timing set. Scott Drake has a great selection of Mustang restoration parts, and Summit Racing stocks the entire Drake catalog, making these parts even easier to get. Here’s how we did the job.
Scott Drake Parts List
(www.scottdrake.com)
P/N C5ZZ-6268-RK, Cloyes roller timing set, $55.95
P/N C4OZ-6020-A, timing-cover gasket set, $34.95
P/N C6ZE-8260/86-B, 1966 concours-correct radiator hoses for 289, $27.95
P/N C5ZZ8287-8 2-65, date-coded V8 hose clamp set, $21.95
P/N C2DZ-8597-A, coolant bypass hose, $5.95
Summit Racing Parts List
(www.summitracing.com)
P/N WMR-W89711, harmonic balancer installer/puller, $69.99
P/N WMR-W136P, three-jaw gear puller, $14.97
P/N LUC-10679-1, Lucas Oil 10W30, $35.97
P/N MOF-FL1A, Motorcraft oil filter for 289, $3.97
Other Parts
Super Clean, 1 gallon, $18.25
Evapo-Rust, 1 gallon, $19.06
Permatex Right Stuff, 5 oz., $21.49
Prestone antifreeze, 1 gallon, $18.34
Loctite thread sealant, 4 oz., $9.17
Time spent: Five hours
Difficulty: 3/5
-
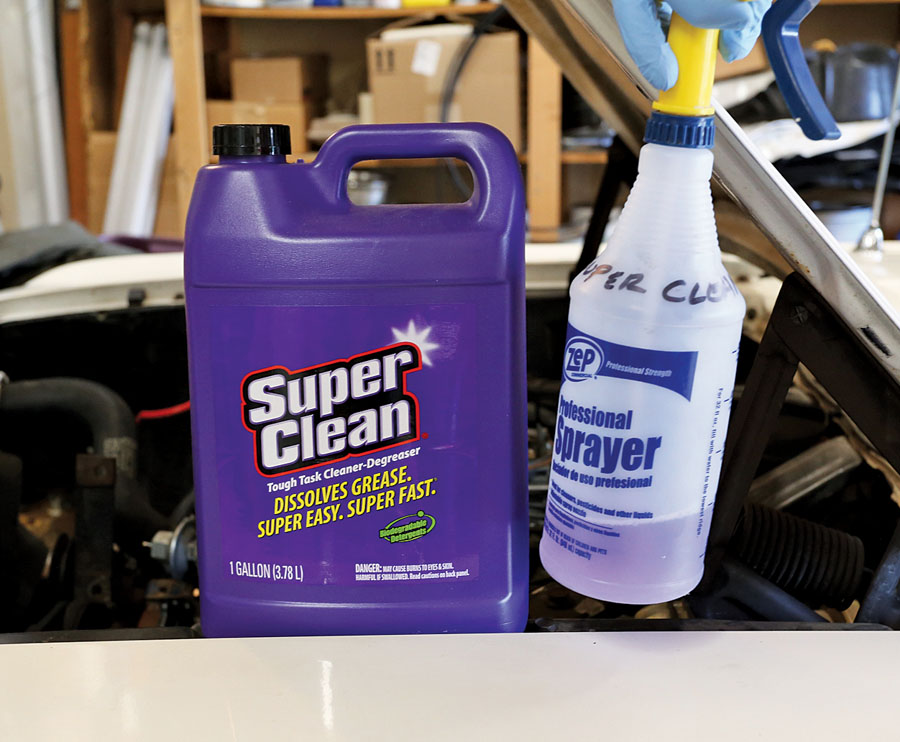
Before starting the tear-down, we elected to degrease the engine using a 50/50 mix of Super Clean degreaser and water. The idea here is to limit what might fall into the oil pan when removing the timing cover — but to not damage any original finishes. We covered the alternator with a plastic sheet and sprayed the front of the engine down with a spray bottle, let it sit, and then rinsed it with water. We repeated this several times and then let it dry. 
-
The water pump has to come off to access the timing cover, so after disconnecting and removing the battery, we drained the cooling system in preparation for the tear-down. -

Next up were the upper and lower radiator hoses, and this crossover hose. Even with the system drained, be ready for a mess, especially when you remove the lower hose. If new hoses are part of your plan, these can be sliced lengthwise at each end with a razor blade for easier removal. -
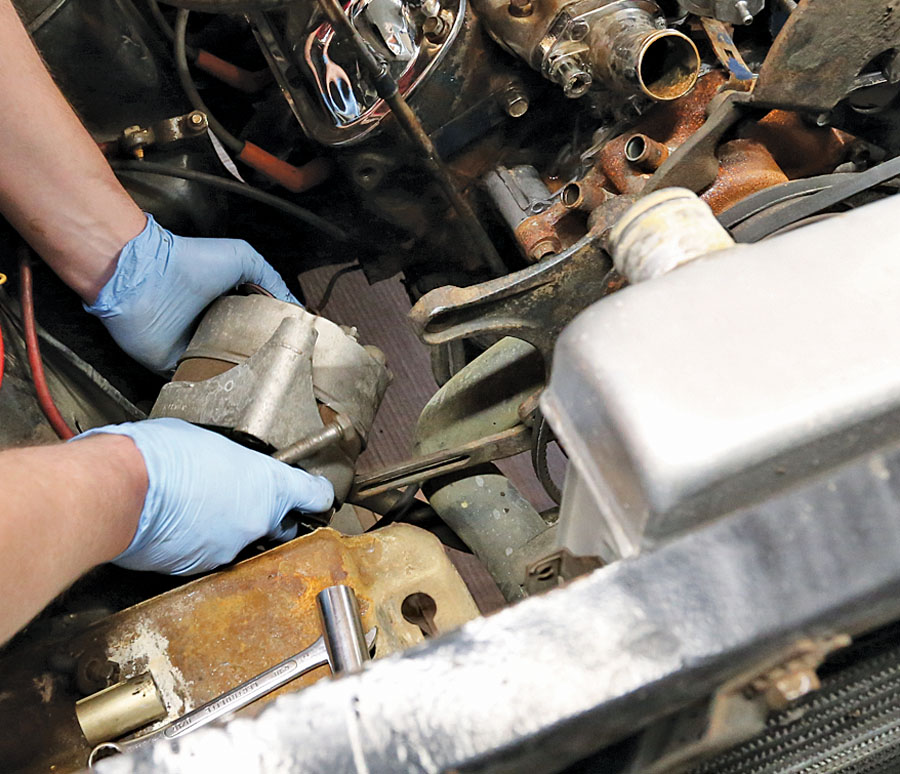
The alternator belt, alternator, and its associated brackets were next — just a few bolts held everything in place. We elected to not disconnect the alternator’s wiring. Instead, we just set it aside and out of the way. We used plastic sandwich bags and a Sharpie to sort and label the hardware as it came off the engine. -

Four 7/16-inch bolts held the fan to the water pump. It’s easiest to remove these with the power-steering belt in place but loose — pushing on the belt stopped the fan pulley from rotating, which let us loosen each bolt. -

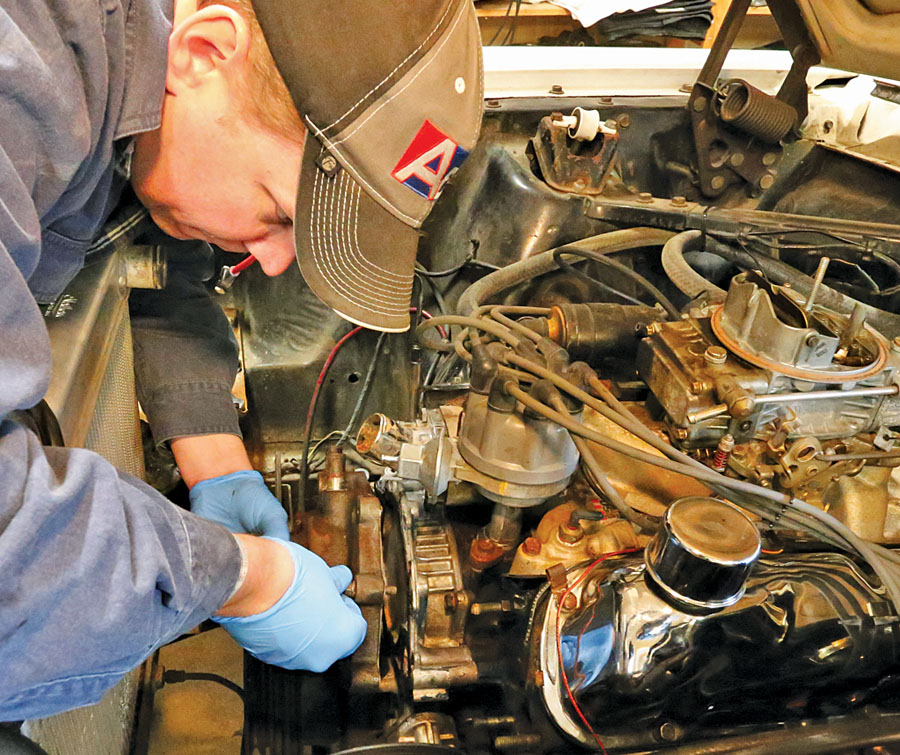
After removing the remaining a/c brackets, we removed the power-steering pump from the front of the engine. Three bolts held it to the cylinder head and the water pump. We then strapped it to the fender to keep it out of the way. -

With the heater hose disconnected, the water pump bolts were next, and then the water pump itself, followed by the fuel pump. -
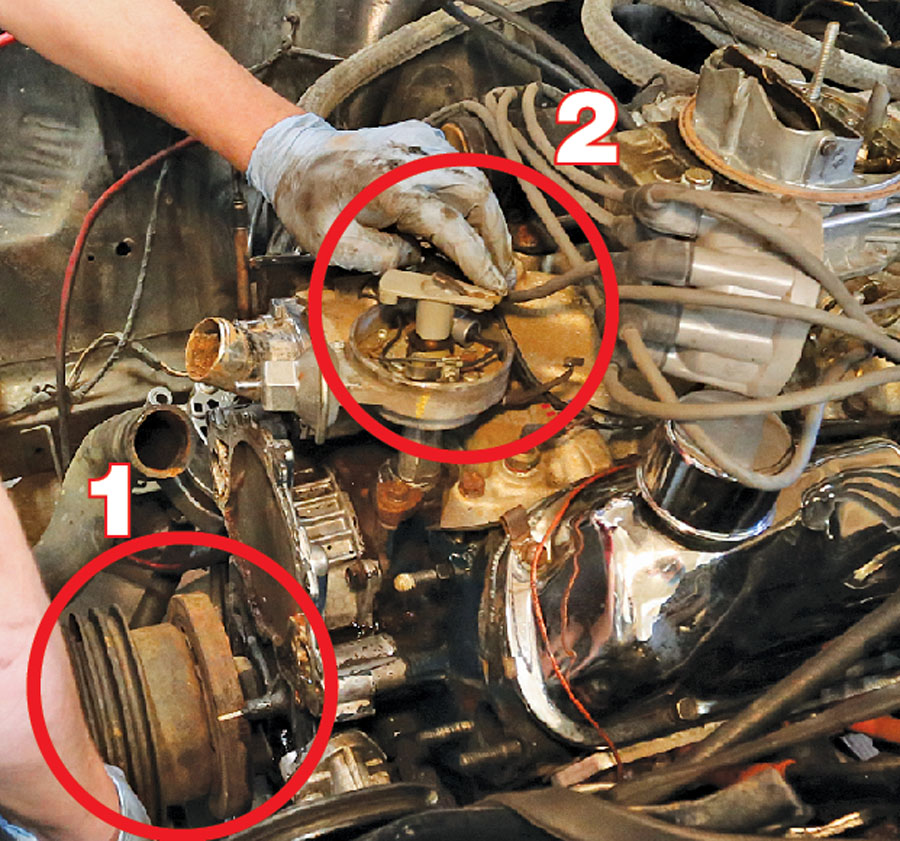
Before going any further, we wanted to make sure the engine was at top dead center. Doing so gives a reference point for both the cam and the crank, which is vital in making sure the engine is positioned properly for the new chain and gears. We rotated the engine by hand using a ½-inch-drive ratchet, watching for the timing mark on the balancer to line up with the pointer (1) and making sure that the distributor rotor was also pointing at the #1 spark-plug wire on the cap (2). The #1 spark plug on a Ford is the passenger’s side front. -
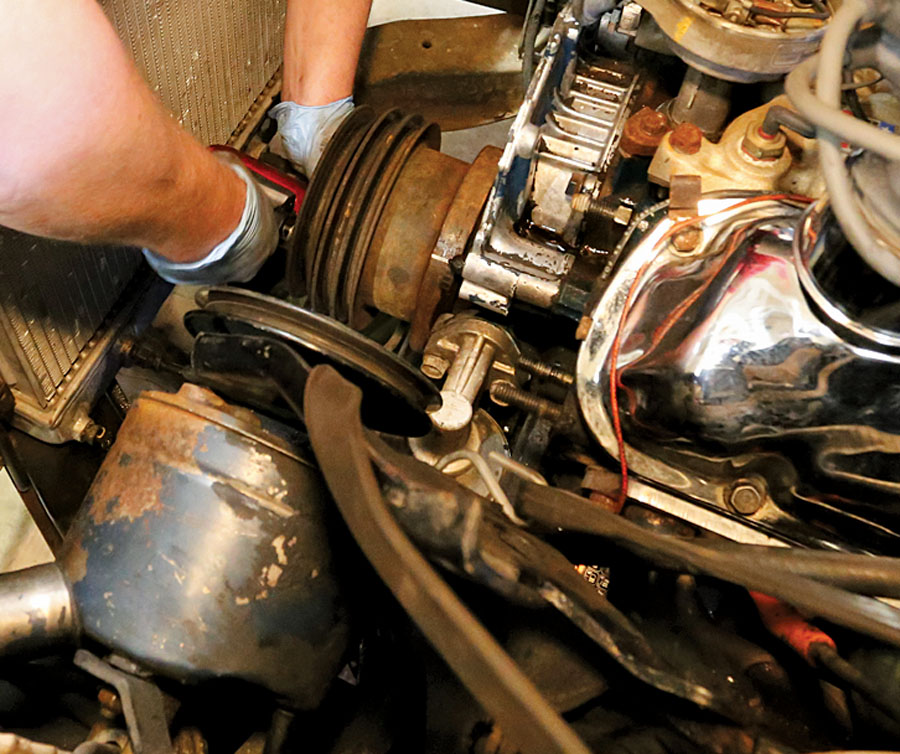
Our lower pulley had been on the car since February of 1966. A little extra help from a pneumatic impact wrench broke the bolts loose, and a few taps with a rubber mallet popped it off the front of the harmonic balancer. -
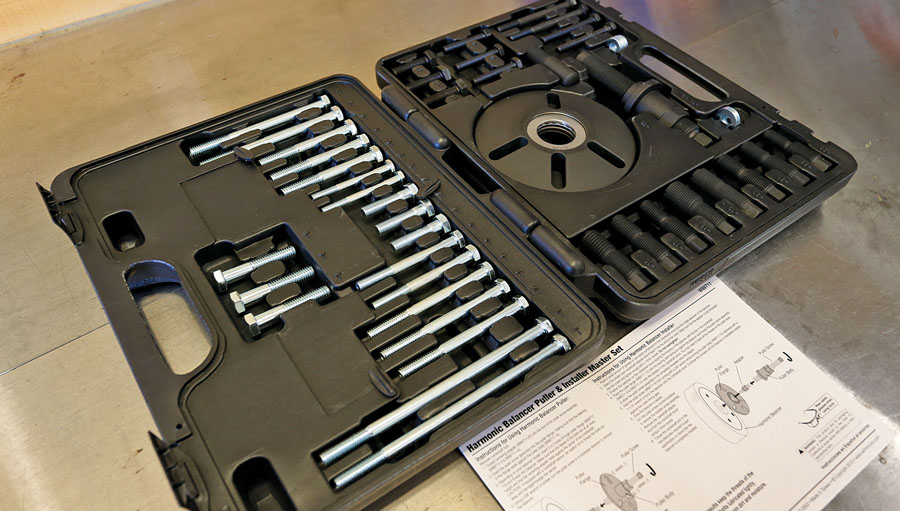
After removing the 15/16-inch retainer bolt at the front of the crank, we needed to remove the balancer. Summit Racing sells this Performance Tool universal harmonic-balancer removal and installation tool. For $70, it’ll handle just about any engine, including our 289. 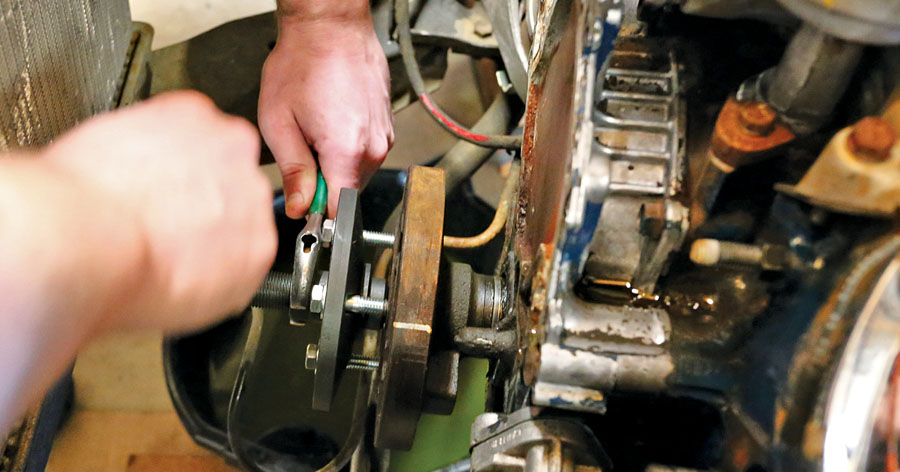
-
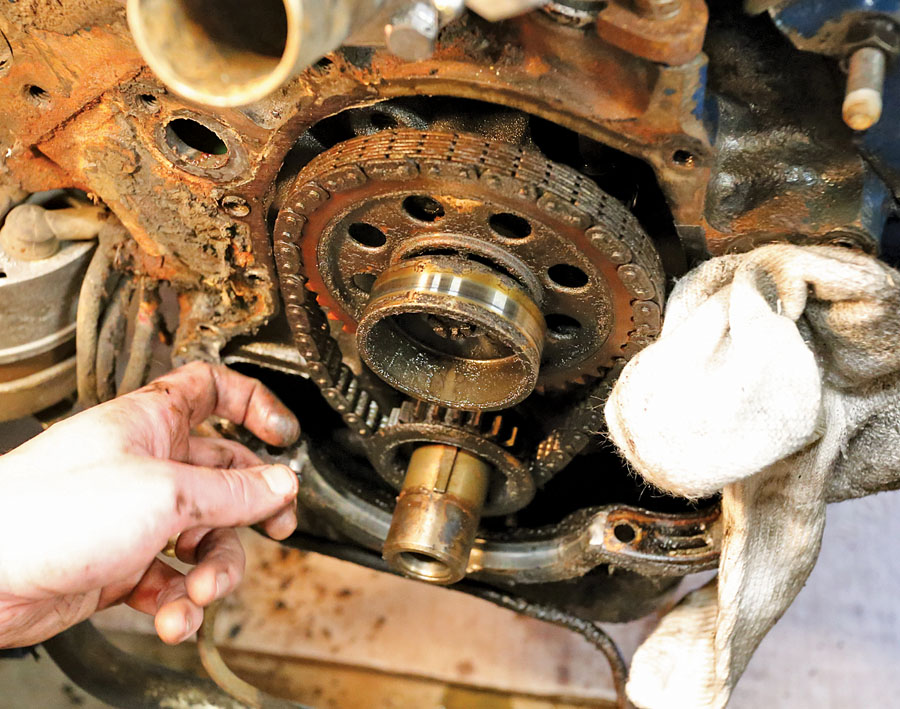
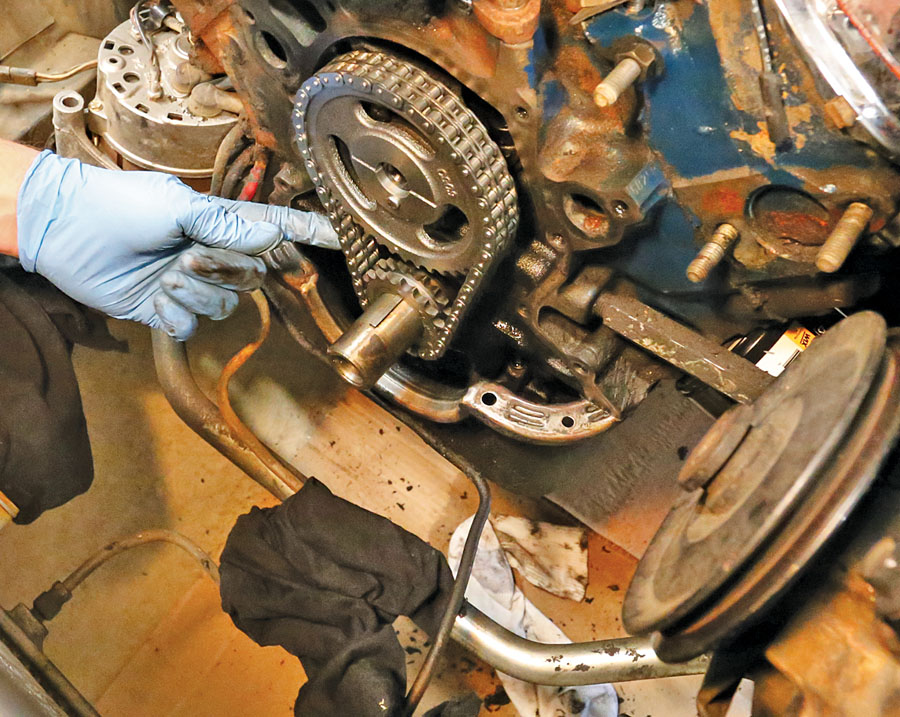
Pulling a few more bolts freed the timing cover, which then exposed the chain. Note the visible slack in the chain — nearly an inch of play. We also stuffed a rag in the coolant port on the driver’s side of the block, as it was dribbling antifreeze down into the open oil pan. -
With the fuel-pump eccentric unbolted and out of the way, the upper gear is next. It can be walked off carefully with a pair of prying tools. We also stuffed clean rags in the oil-pan opening to eliminate debris entering the oiling system. -
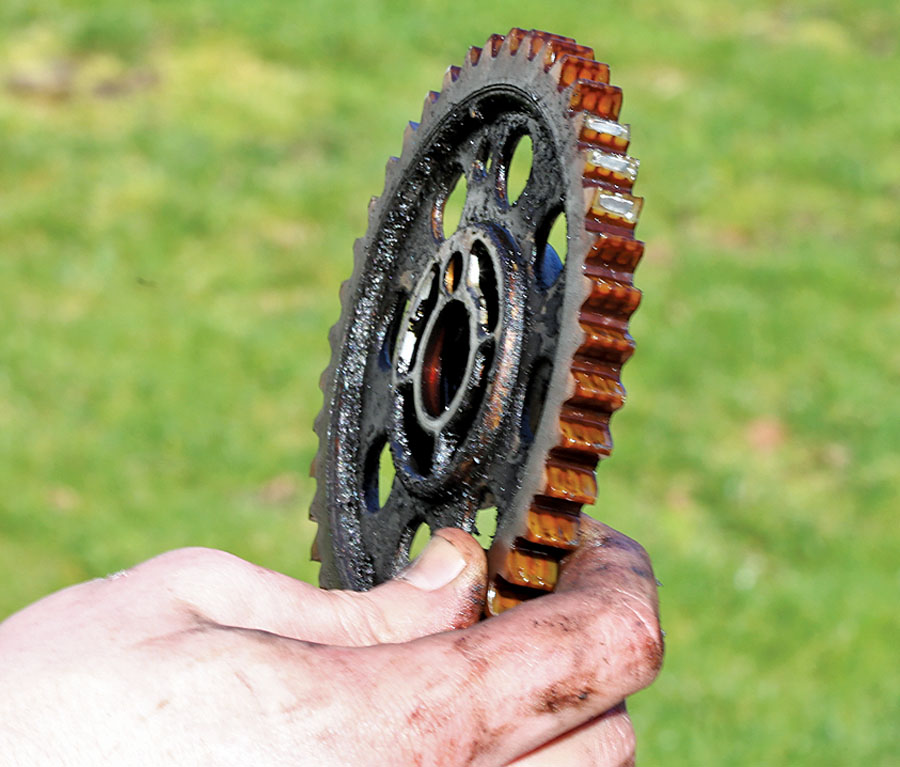
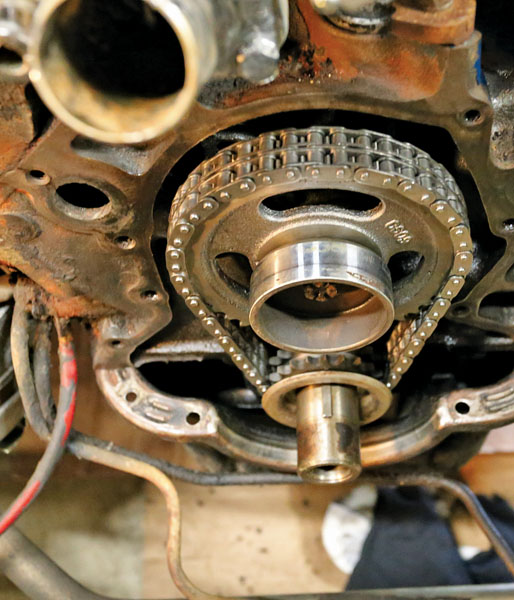
In addition to the sloppy chain slack, note the missing plastic teeth on the cam gear. This set was ripe for replacement. -
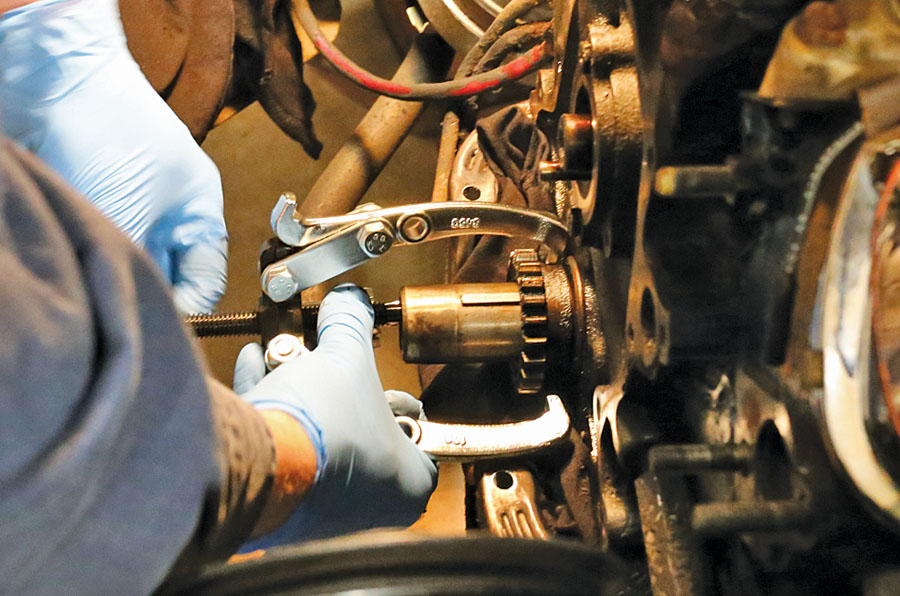
This Performance Tool gear puller (P/N WMR-W136P, $14.97) is just the right size to pull the lower timing gear off the crankshaft if it’s stuck in place. Ours slid right off by hand. -
With our parts removed, it was time to think about whether to break out a can of Ford Blue paint. Here’s why we didn’t — note the difference in color between new paint and the old paint. We may restore this engine compartment at a later date, but it won’t be done piecemeal. For now, we chose to leave our remaining factory finishes intact. -
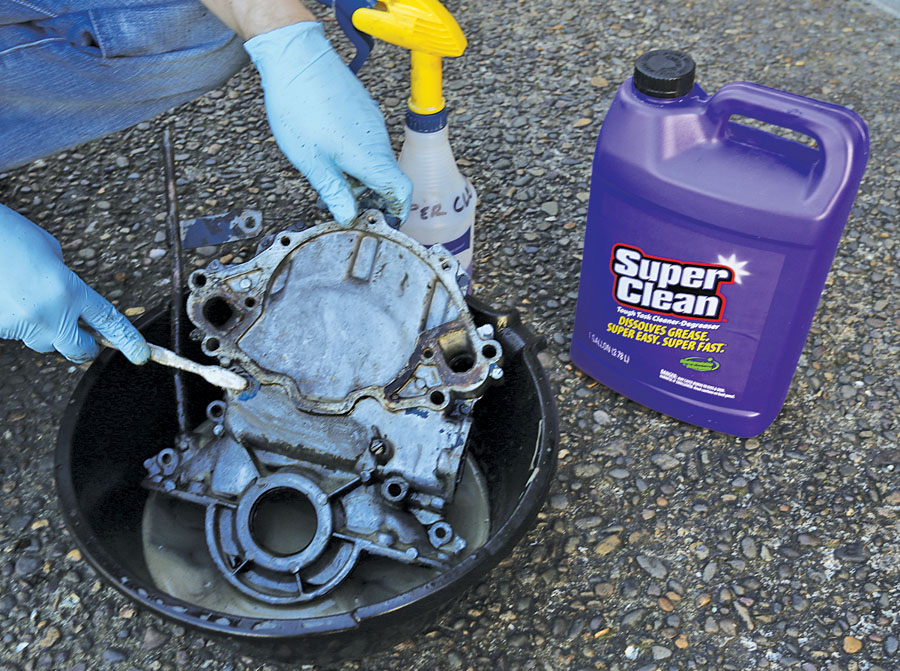
The timing cover was coated in years-thick sludge, so more Super Clean was in order — this time with an old toothbrush to get into the hard-to-reach areas. -
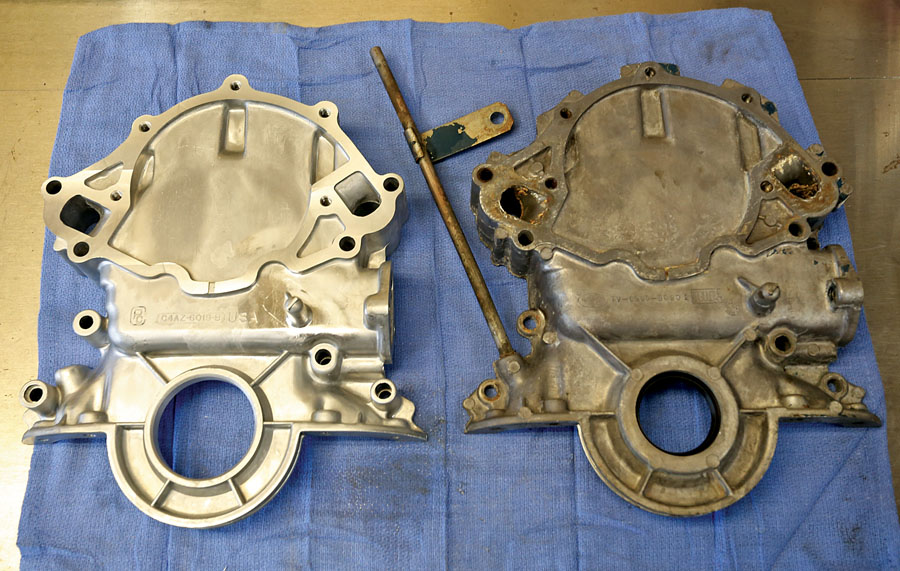
Our factory timing cover cleaned up well (right), but many originals become pitted and leaky over time. If you need it, Scott Drake’s got you covered with an OE-style replacement (P/N C4AZ-6019-B, $125.95, left). A concours-correct version is also in the works, available in a few months. -
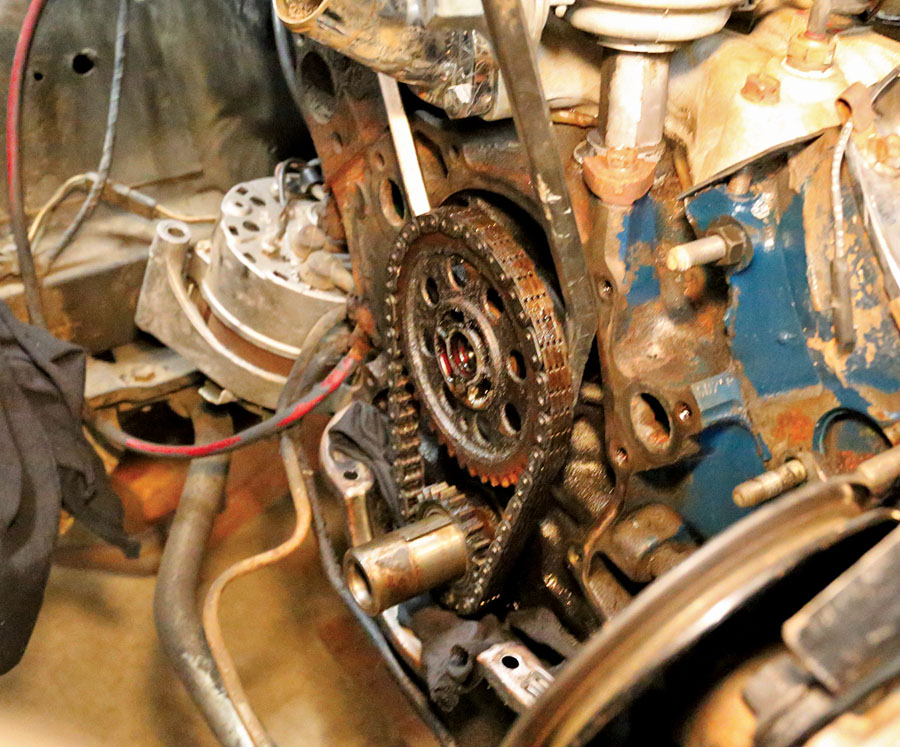
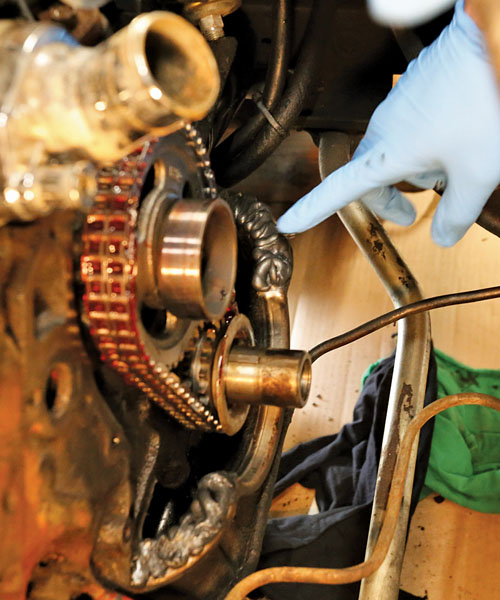
The heart of this project is the Cloyes Roller timing set. The lower gear has three keyways, with one advanced setting, one retarded setting, and one straight-up setting. We installed ours straight up, aligning the pointers at the upper and lower gear. -
Next up was the freshly cleaned fuel-pump eccentric and bolt, which we torqued to 35 ft-lbs. We also refitted the original oil slinger in front of the lower gear. Note the cleaned-up block and pan mating surfaces — a razor-blade scraper made quick work of gasket remnants, and some brake cleaner on a rag finished off the job. We then lubed up the chain with assembly lube. -
The original cover, fitted with a new crank seal, was next. The Scott Drake timing-cover gasket set came with replacement oil-pan corner gaskets, which we elected not to use in favor of a thick coat of gasket maker. Permatex Right Stuff is our preferred sealant, as it dries quickly and is thick, making it easy to work with. We used a healthy amount and made sure to run it into the corners at the block to eliminate any possible oil leaks. -

Early Ford 289s don’t have alignment dowels that center the timing cover at the crank, so before tightening down the timing-cover bolts, and before installing the four that come up from the oil pan, the harmonic balancer must be reinstalled to center the cover with respect to the oil seal at the crank. We then tightened down the cover bolts, reinstalled the four that come up from the oil pan, and used a razor blade to cut off the excess sealant that squeezed out from the cover. -
Our rusty water pump was next, and rather than replace it, we elected to clean it. Evapo-Rust is a biodegradable, non-toxic, non-corrosive rust remover that’s really easy to use. An hour under Evapo-Rust-soaked paper towels was all it took to make this pump presentable again. -
A quick coat of Right Stuff on the water-pump gasket helped seal it to the timing cover and the water pump, and a little Loctite thread sealant kept the bolts that pass into the engine’s water jacket from becoming sources of coolant leaks. -

Reassembly is easy if you bagged each component’s bolts and marked them correctly. We took extra time to clean everything as we reassembled. -
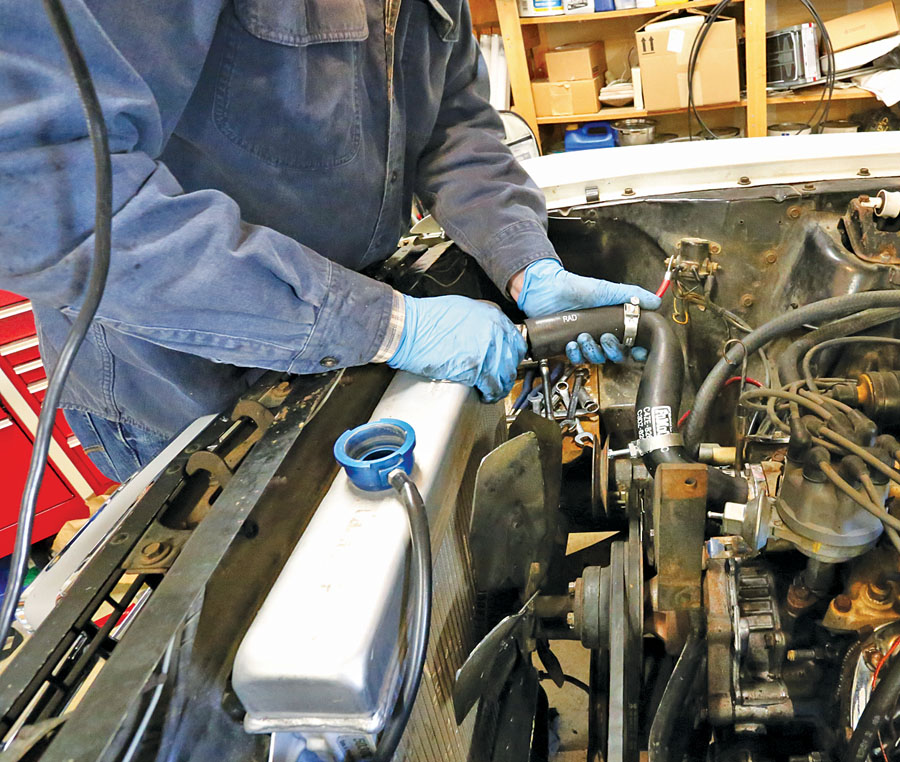
Scott Drake’s concours upper and lower radiator hoses have all the proper markings of the originals. Pairing them with their reproduction date-coded hose clamps finishes off the look for OE cars. Since our plan is to go back to stock with this car over time, they were a great fit for us. -
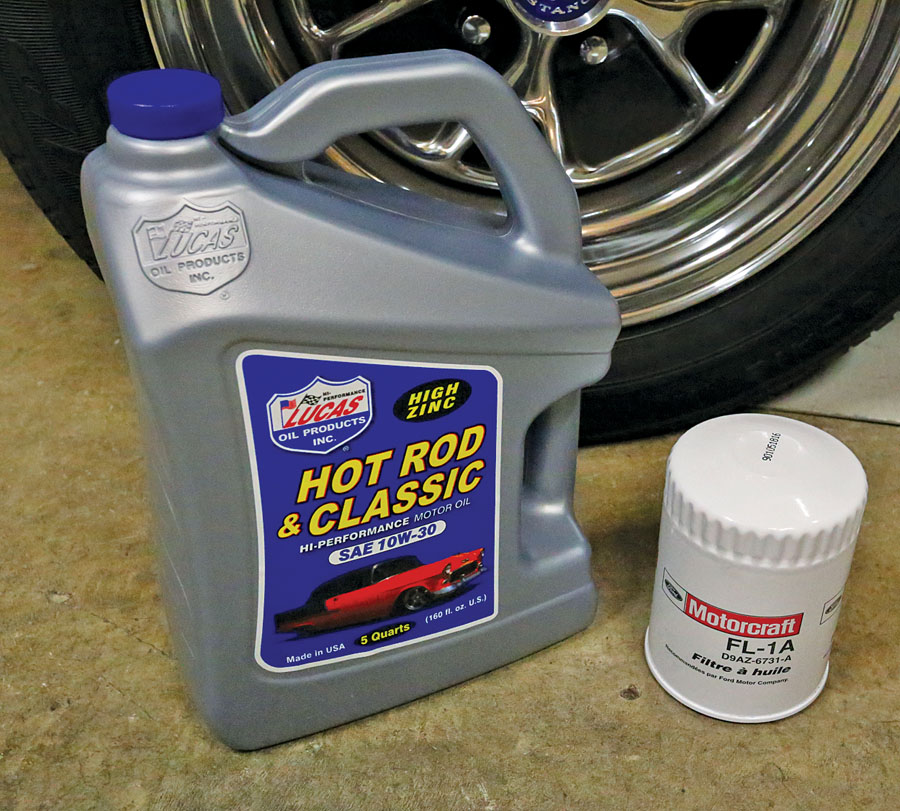
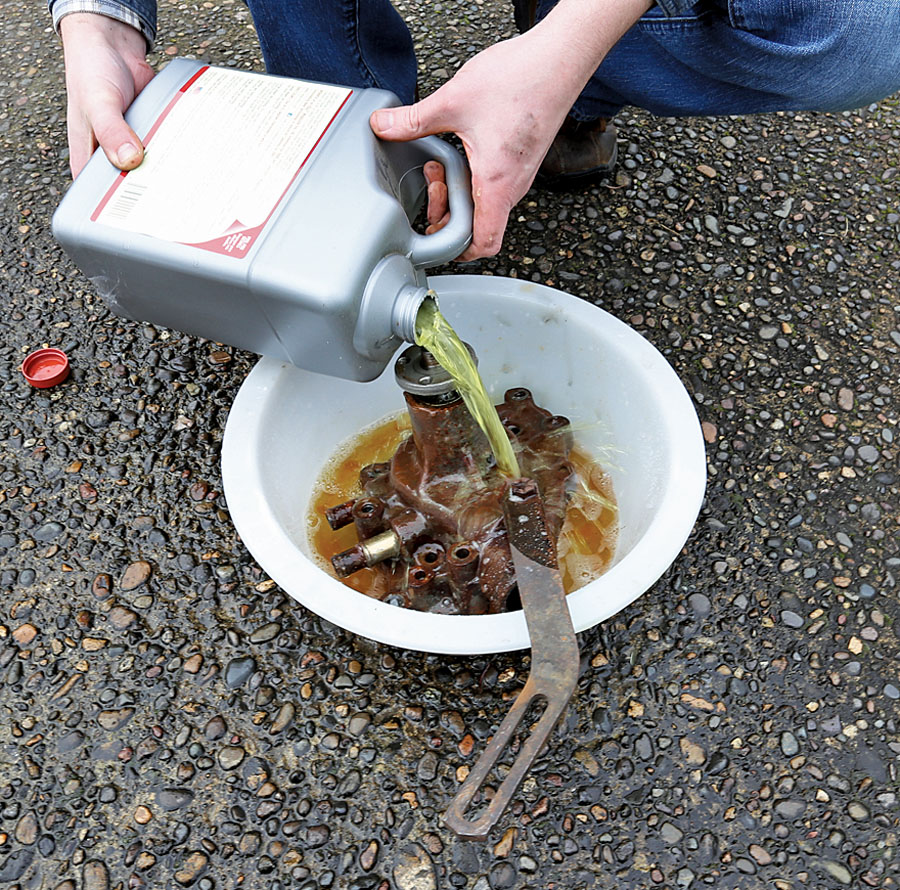
With the cooling system refilled and the battery reinstalled, all that’s left is a quick oil change to eliminate any coolant that might have found its way into the oil pan. For an original flat-tappet engine, Lucas Oil’s Hot Rod and Classic Motor Oil in 10W30 is just the thing — it has high levels of zinc and phosphorus, which flat-tappet engines require to reduce wear. -
A quick once-over for leaks was the last step before firing up the Mustang, which went into a nice, high idle. No more timing worries here — the roller chain should help keep that original engine running for years to come.